Choosing the perfect RV roof repair kit is essential in keeping your RV in prime shape. It's all about shielding your mobile haven from unpredictable weather, leaks, and the sun's relentless rays. A top-notch roof repair does more than just extend your RV's lifespan—it ensures your travels are worry-free, come rain or shine. With the RV Flex Repair One Weekend Roof Kits, you're ready to hit the road with confidence, knowing your RV is well-guarded against the elements.
Is your RV’s roof getting tired? Ready to restore or repair your RV, camper, or trailer roof? Need a lifelong solution? Our roof sealant is what you need.
RV roofs have a limited life before they need to be replaced. Generally, it's on average every 10–15 years. This typically costs approximately $3000–$4000 each time unless you know the secret to restoring your roof once and for all at an average lifetime cost of about $549.95 with our roof coating.
Are you asking yourself how is this possible? It's possible with new technology that has been developed recently, which allows 50+ years of performance.
RV manufacturers who build RV's are not concerned about how long your roof lasts, they just want to make sales and have it last long enough so they don't get any warranty recalls. Plus, if they offer RV service centers, they make a killing servicing your RV year after year.
Now, why would you want to dish out $10,000 over the life of your RV when you can do it once for about $549.95 with our RV roof sealant and have it guaranteed for the life of your RV?
I didn't want to either, and that's why I developed the only roof coating that is guaranteed for the life of your RV. Read MY STORY for full details.
The great part is that it's super simple to repair your roof once and never have to worry about it again. Here's how you do it:
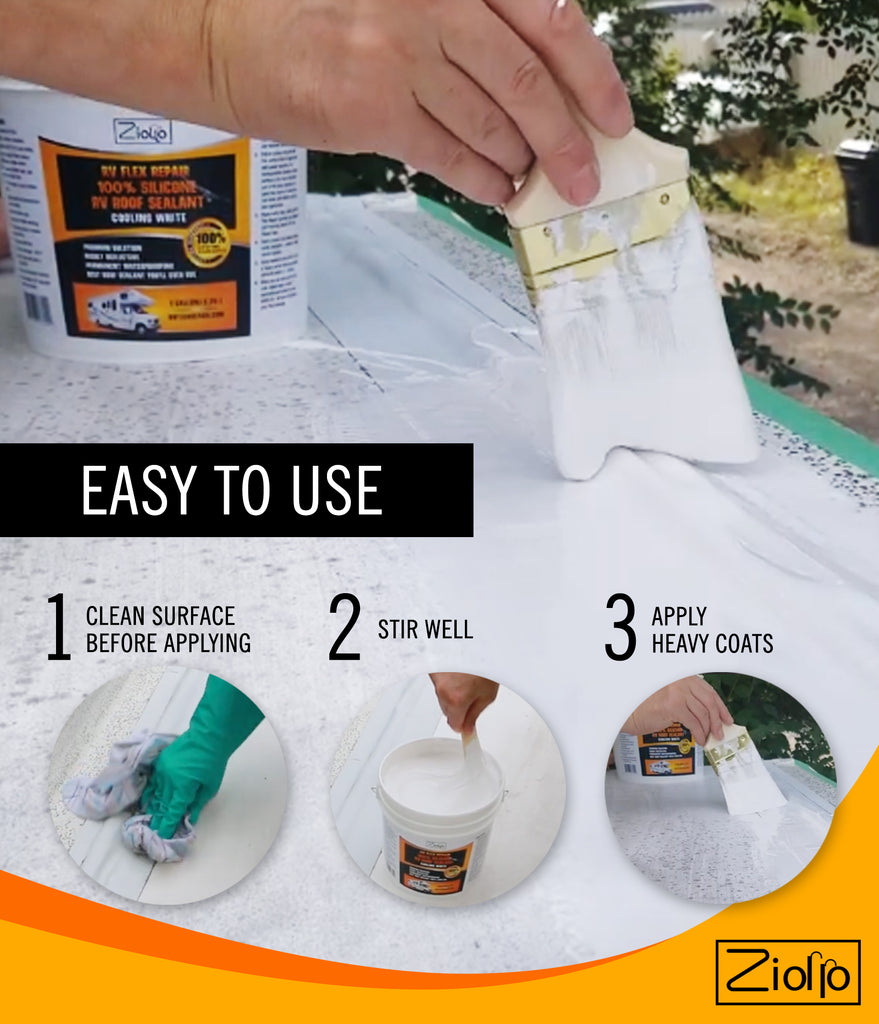
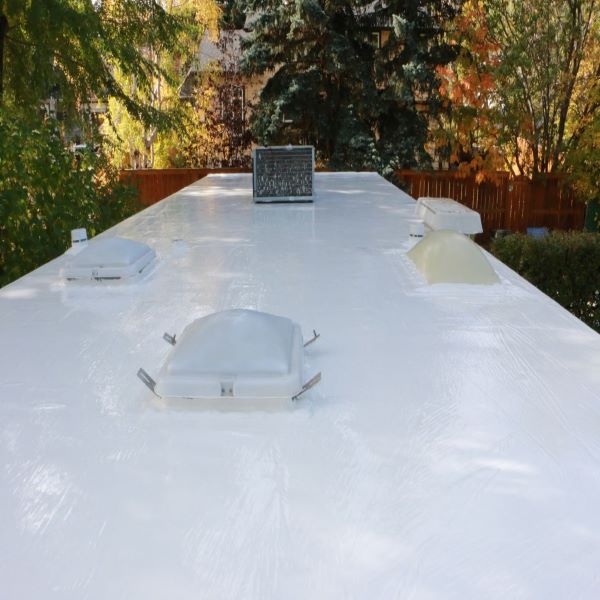
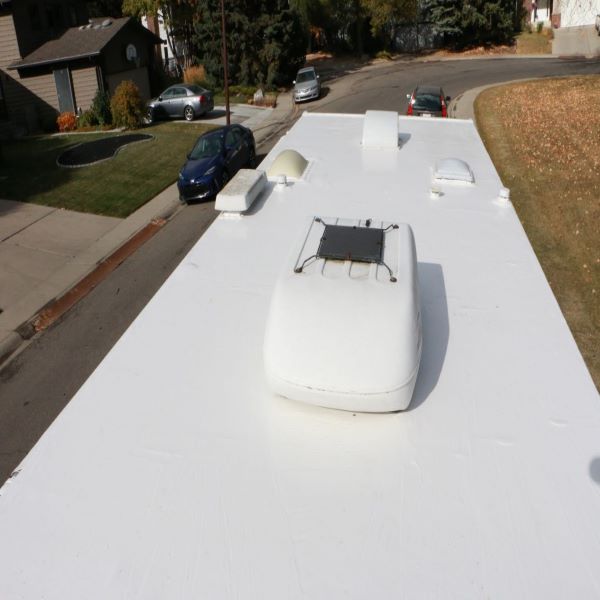
Step 1: Clean the roof—power washing is recommended. If you don't have one, use a scrub brush and biodegradable cleaner. Remove all silicone and old, flaky caulking that isn't silicone. Non-silicone caulking can be coated over if it's adhered well. Give a final wipe with Acetone before application; this promotes adhesion and acts as a final cleaner.
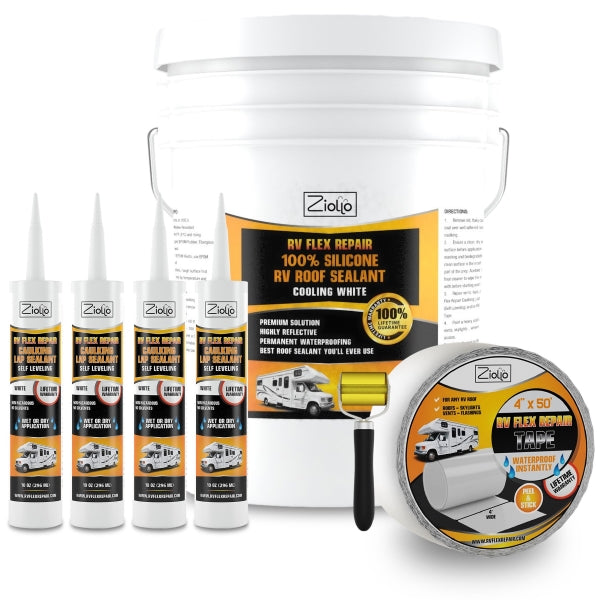
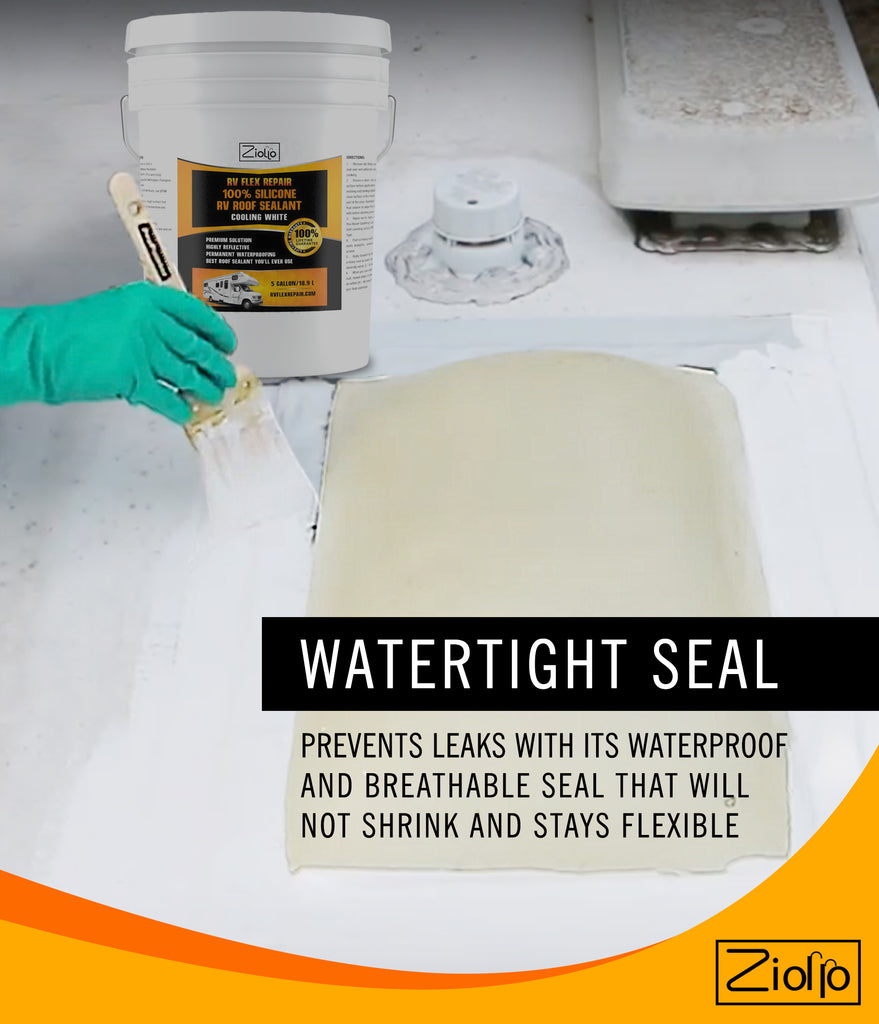
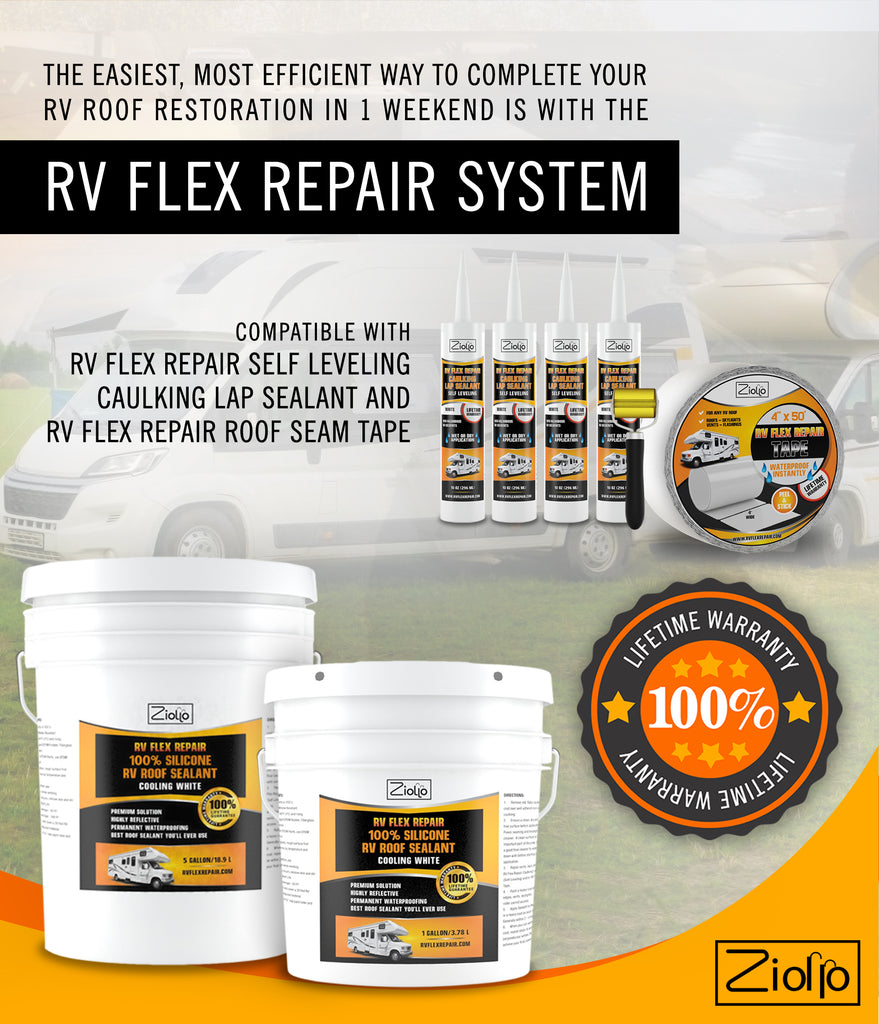
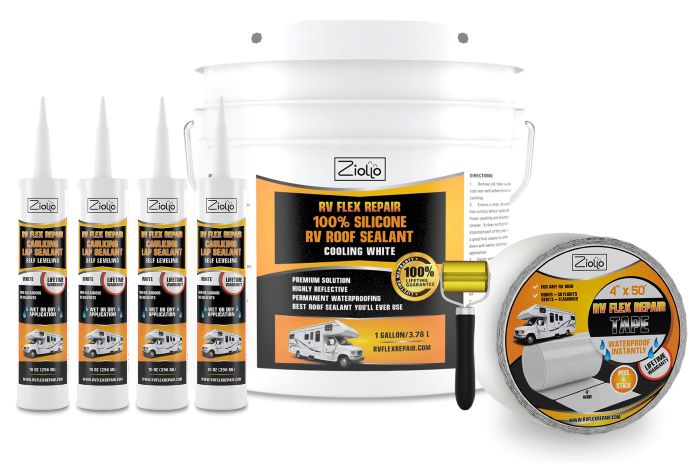
Step 2: Once dry, complete your prepping with your choice of RV Flex Repair products. RV Flex Repair Roof Tape is used to bridge larger areas and seams. RV Flex Repair Self-Leveling Caulking Lap Sealant is used around vents, seams, and skylights. You can also use the RV Flex Repair 100% Silicone RV Roof Coating around vents and skylights.
Step 3: Apply a heavy coat of 100% Silicone Roof Coating around areas you will not be able to roll. i.e., edges, around vents, skylights, AC, etc.
Step 4: Apply a heavy coat of 100% Silicone Roof Coating to the entire roof. You can use a small pail or pitcher to scoop out of the 5G pail and pour it into the section you’re working on.
Step 5: If you apply the coating thick enough on your first coat, you can complete the final coverage required in one coat. If not, prepare to apply a second layer as soon as the first one is ready for additional work. This is typically within 24 hours.
Tips for Effective Application
Here are pro tips to guide you through an easy, effective repair process for your RV.
-
Preparation and storage: Begin by thoroughly stirring the coating to achieve a uniform consistency. To prevent the coating from curing prematurely due to moisture in the air, always replace the lid on the pail when it's not in use.
-
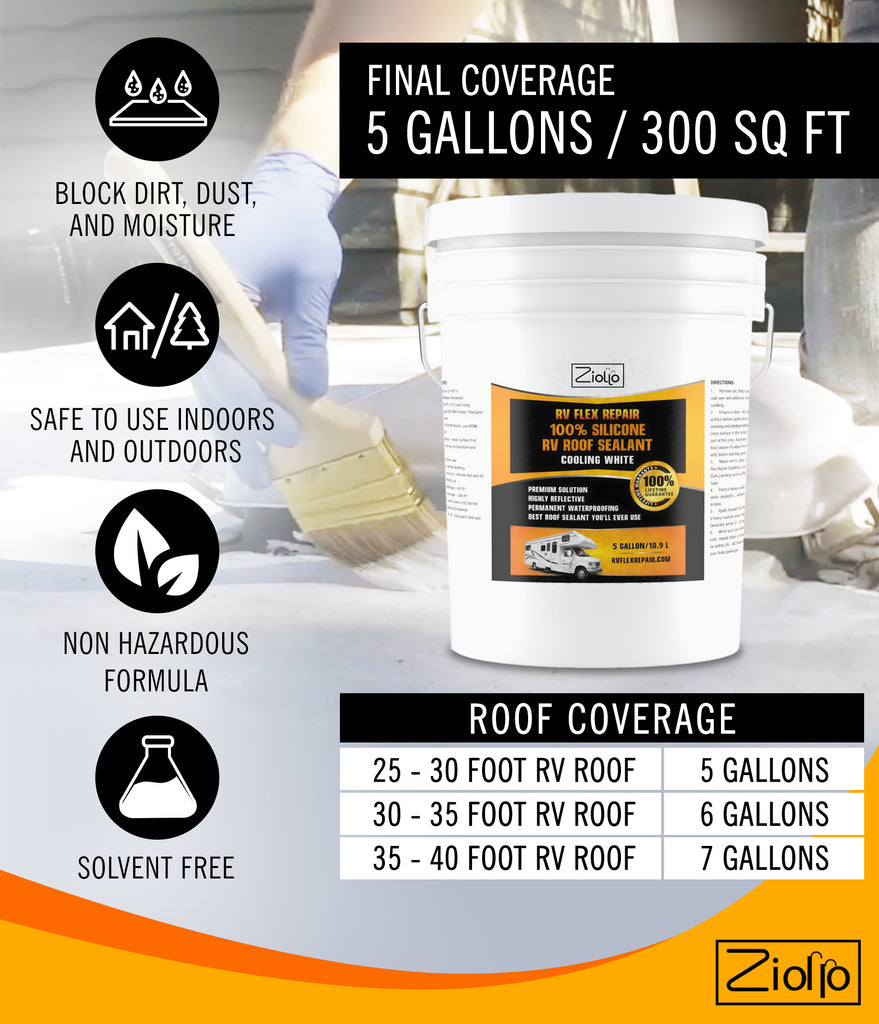
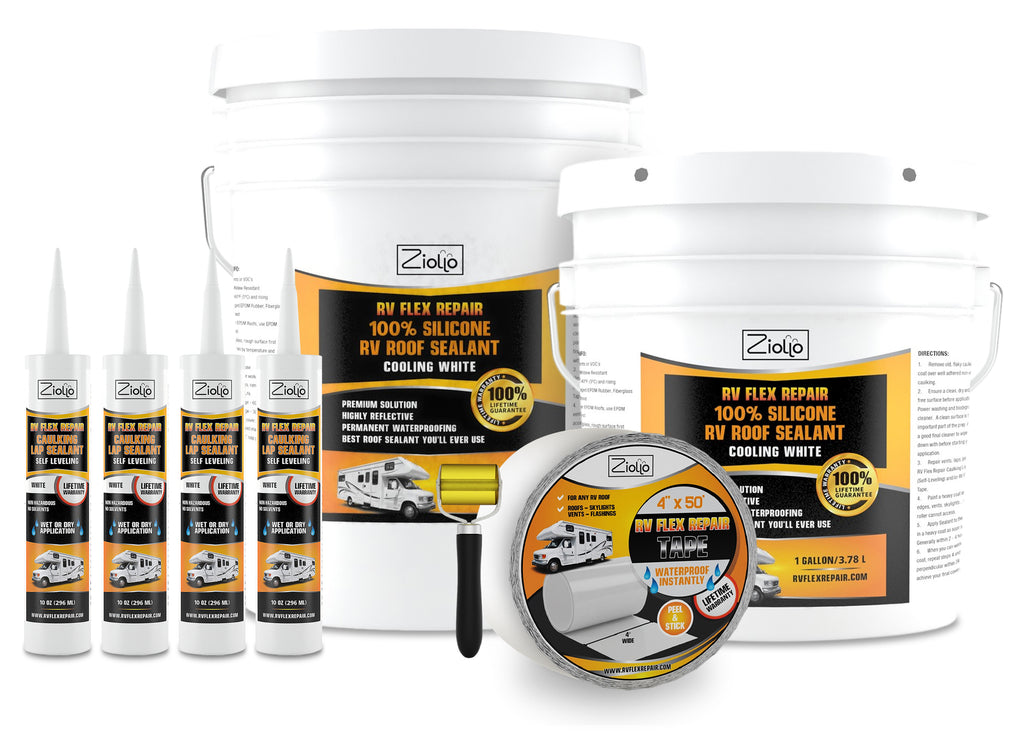
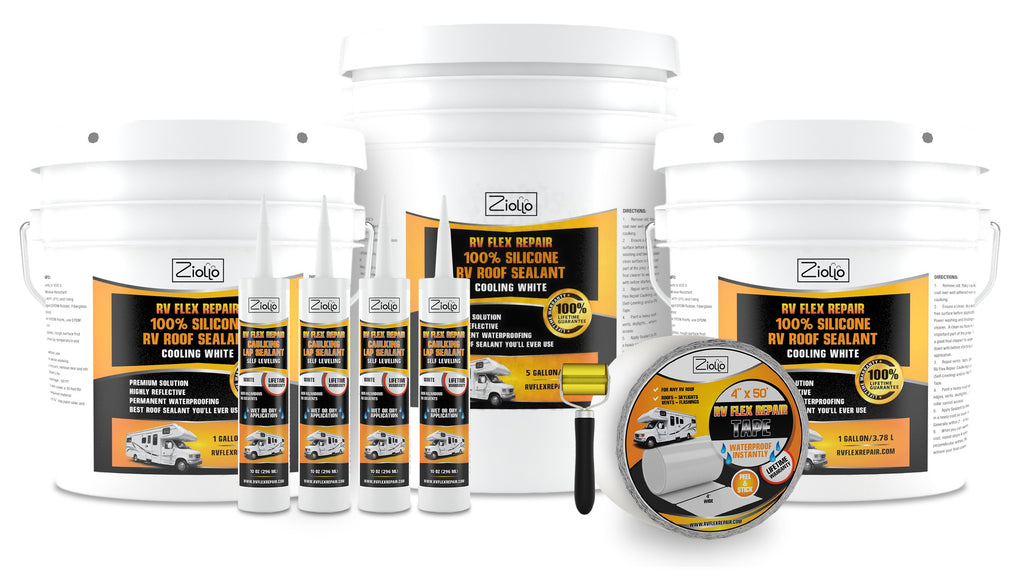
Coverage and kits: The coating is designed to cover about 60 sq ft per gallon. Depending on your RV's size, we offer tailored kits:
-
For an RV under 30 ft: The kit includes 5 gallons of coating, 1 roll of roof tape, and a 4-pack of self-leveling caulking.
-
For an RV under 35 ft: The kit includes 6 gallons of coating, 1 roll of roof tape, and a 4-pack of self-leveling caulking.
-
For an RV under 40 ft: The kit includes 7 gallons of coating, 1 roll of roof tape, and a 4-pack of self-leveling caulking.
-
For small repairs: The kit includes 1 gallon of coating, 1 roll of tape, and a 4-pack of self-leveling caulking.
-
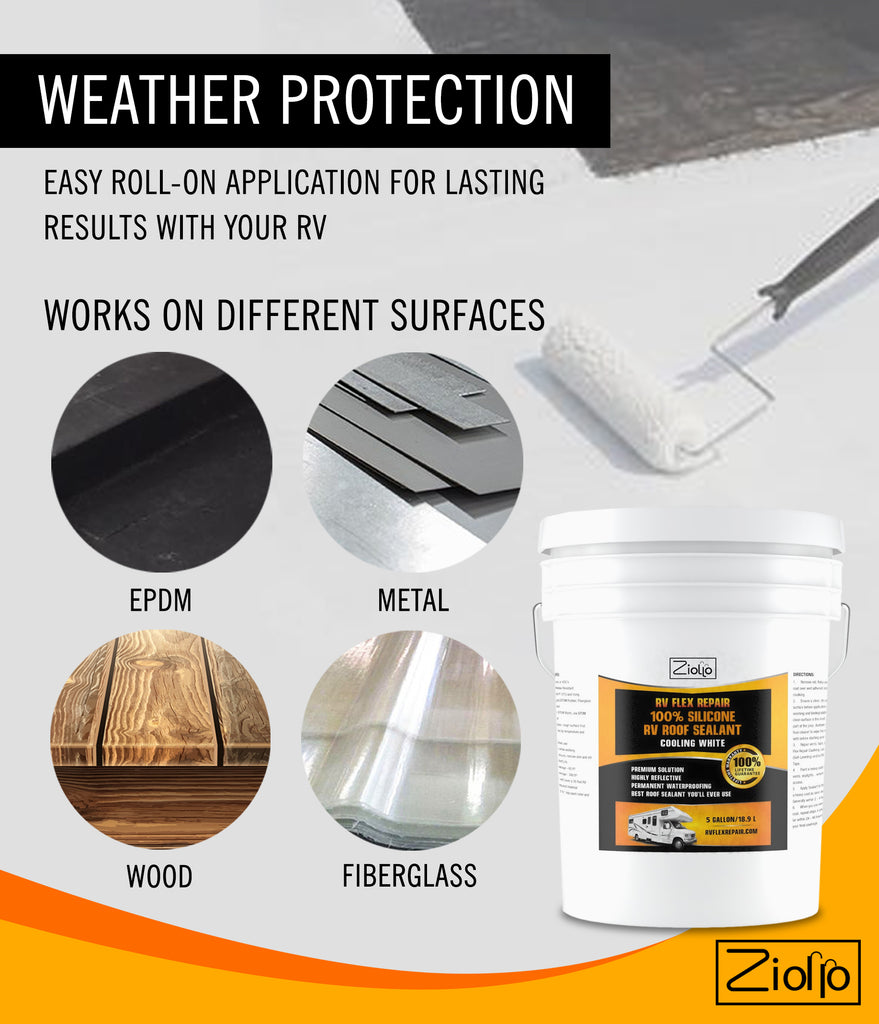
Application conditions and surfaces: Ensure the ambient temperature is at least 40°F (5°C) and rising before application. This coating works excellently on an aged EPDM roof, fiberglass, metal, and wood. For fiberglass roofs, preliminary sanding is recommended to ensure the coating adheres properly.
-
Curing, skinning, and application technique: Curing times vary with temperature and humidity. If the coating begins to skin over in the pail, remove this layer and stir well before continuing. For application, standard paint rollers are suitable—apply with a light touch, but don't be shy with the amount of coating you roll on.
-
Shelf life and guarantee: Stored properly, the coating remains effective for up to 2 years. We stand by the quality of our product with a 100% Lifetime Guarantee, providing you with complete confidence in your purchase.
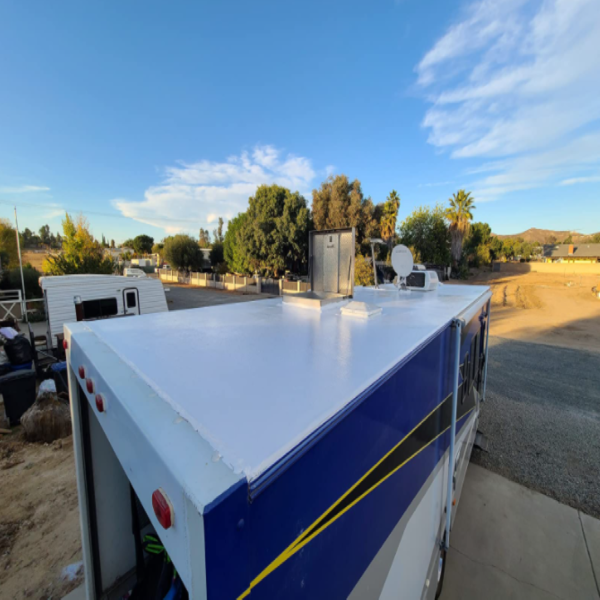
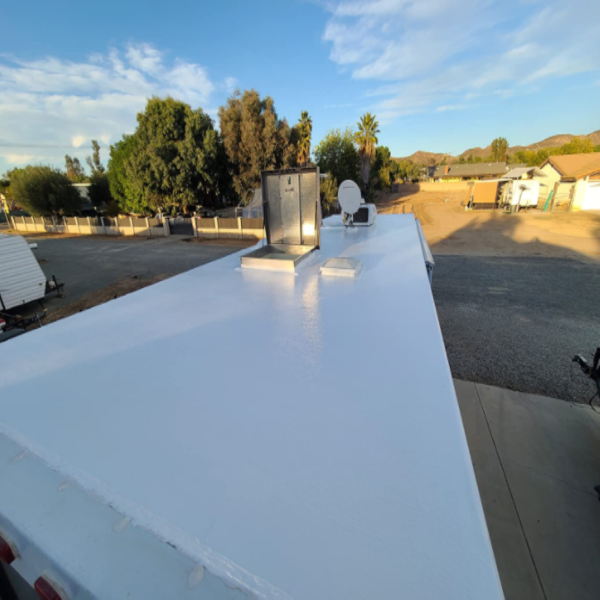
That's how easy it is to repair your RV’s roof and forget about doing roof maintenance ever again. Go ahead and restore your roof for the last time now.
To get started on your project, you'll need to gather a few essential items to ensure a smooth and effective application process:
- Power washer or biodegradable soap and scrub brush to clean the surface.
- Acetone and rags for a final wipe (available at stores like Home Depot or Walmart).
- One-time use paint brushes, rollers, and pole extensions (can be found in a Dollar Store).
- Paint tray and small bucket
- Disposable gloves
- Painter's tape